

Share this post:

People love their dogs and dogs love their people so it is only natural that you would want to take your dog on your next camping trip. With this in mind, we asked our readers to let us know what questions they would have about taking their dogs camping.
We have the top 16 questions and answers right here just for you.
Clickable Table Of Contents
1. Should I take my dog camping?
This is the #1 question and is often asked by people who have new dogs or people who are relatively new to camping.
Taking your dog camping can be a wonderful experience for both you and your furry friend, but there are a few things to consider before making that decision:
- Health and Age:
- Consider your dog’s health and age. If your dog is elderly, has health issues, or is not used to physical activities, camping might not be the best idea.
- On the other hand, if your dog is energetic and healthy, camping can be a great way for them to get exercise.
- Temperament:
- Some dogs love the outdoors and are comfortable in new environments, while others may become stressed or anxious.
- If your dog is generally friendly and adaptable, they may enjoy the camping experience.
- Training:
- Ensure that your dog has basic obedience training.
- Commands like sit, stay, and come can be crucial in a camping environment, especially if you’re in an area with wildlife.
- Comfort:
- Bring items that will make your dog comfortable, such as their bed, a familiar blanket, and their favorite toys.
- Also, check the weather forecast to ensure your dog won’t be uncomfortable in extreme conditions.
- Leash and Containment:
- Many camping areas have leash laws, and it’s essential to respect them.
- Even if the area allows off-leash activities, be sure your dog is well-behaved and won’t disturb other campers or local wildlife.
- Health and Safety:
- Pack a basic doggy first aid kit, and ensure your dog’s vaccinations are up-to-date.
- Also, be aware of any potential hazards in the camping area, such as toxic plants or wild animals.
- Noise Considerations:
- Keep in mind that some dogs may become more vocal in unfamiliar environments.
- Be mindful of noise levels to avoid disturbing other campers.
- Campsite Regulations:
- Before heading out, check the campsite regulations to ensure dogs are allowed.
- Some areas may have restrictions or specific rules regarding pets.
- Waste Disposal:
- Be responsible for cleaning up after your dog.
- Bring waste bags and dispose of them properly to keep the campsite clean.
- Trial Run:
- If your dog has never been camping, consider a short trial run to gauge their reaction and behavior outdoors.
Remember that each dog is unique, so consider your dog’s individual needs and preferences.
If your dog is well-prepared and the campsite is dog-friendly, camping can be a fantastic adventure for both of you.

2. Do dogs love camping?
While most people think their dog(s) will love going camping, that may or may not be the case.
While dogs are individuals with their own unique personalities, many dogs do enjoy camping for several reasons:
- Exploration: Dogs are naturally curious animals, and a camping trip provides them with new smells, sights, and sounds to explore. This novelty can be very stimulating and enjoyable for them.
- Physical Activity: Camping often involves outdoor activities such as hiking, walking, and playing, which can be great for a dog’s physical health and mental stimulation. Dogs that love being active may particularly enjoy the opportunity to run and play in a new environment.
- Bonding Time: Dogs are social animals and enjoy spending time with their human companions. Camping provides an opportunity for increased bonding as you share new experiences.
- Natural Instincts: Many dogs have instincts that align with the outdoor environment. Breeds that were originally developed for hunting, herding, or retrieving may feel right at home in a camping setting.
- Unrestricted Exploration: Unlike urban environments where dogs are often on leashes, camping areas may offer more freedom for dogs to explore off-leash (where permitted). This freedom can be very appealing to dogs.
However, it’s important to note that not all dogs are the same, and individual preferences vary. Some dogs may be more sensitive to new environments, sounds, or smells, and they might find camping stressful. Additionally, factors such as the dog’s age, health, and prior experiences can influence their enjoyment of camping.
If you’re considering taking your dog camping, it’s a good idea to gauge their comfort level in outdoor settings gradually. Start with shorter trips or visits to parks to see how they respond before committing to an extended camping excursion. Always prioritize your dog’s safety, well-being, and comfort during any outdoor activities.

3. How do you camp with a dog in the rain?
Camping with a dog in the rain requires some extra preparation to ensure both you and your furry friend stay comfortable and safe.
Here are some tips for camping with your dog in the rain:
- Waterproof Gear:
- Invest in waterproof gear for both you and your dog.
- This includes a rain jacket for your dog, as well as a waterproof jacket or poncho for yourself. Make sure the gear is breathable to prevent overheating.
- Dry Sleeping Area:
- Set up your tent on high ground to avoid puddles and potential flooding.
- Place a waterproof ground tarp or footprint under the tent to prevent moisture from seeping through the floor.
- Cozy Bedding:
- Ensure your dog has a comfortable and dry place to sleep.
- Bring a waterproof dog bed or elevate their bed off the ground to avoid dampness.
- Quick-Dry Towels:
- Pack quick-dry towels to wipe off your dog if they get wet.
- Towel-drying your dog before entering the tent helps keep the sleeping area dry.
- Dog-Friendly Rain Gear:
- Consider using doggy rain boots to keep your dog’s paws dry and prevent mud from being tracked into the tent.
- Some dogs may tolerate raincoats, which can help keep their body dry.
- Tent Etiquette:
- Train your dog to wait outside the tent for a moment while you dry them off before entering.
- This helps minimize the amount of moisture brought into the tent.
- Entertainment:
- Bring some extra toys or treats to keep your dog entertained inside the tent during rainy weather.
- Dogs may get restless if they can’t go outside as much, so having some indoor activities can be helpful.
- Drying Area:
- Designate an area near the entrance of the tent for removing wet gear and drying off.
- This can help keep the sleeping area cleaner.
- Stay Warm:
- In cold and wet conditions, ensure your dog stays warm.
- Consider bringing a doggy sweater or coat if the temperature drops.
- Check for Leaks:
- Regularly check your tent for leaks, especially during prolonged rain.
- Repair any leaks promptly to maintain a dry shelter.
Remember that some dogs may not enjoy rainy weather, so pay attention to your dog’s behavior and comfort level. If your dog seems distressed or uncomfortable, it might be best to cut the trip short or find ways to make them more comfortable.

4. Should your dog sleep in your tent with you?
Whether or not your dog should sleep in your tent with you depends on various factors, including your dog’s behavior, the camping location’s rules, and your personal preferences.
Here are some common things that should be considered:
- Campground Rules:
- Check the rules of the campground or park where you plan to camp.
- Some places may have specific regulations regarding dogs, including whether they are allowed in tents or if they need to be leashed or restrained.
- Dog’s Behavior:
- Consider your dog’s behavior and training. If your dog is well-behaved, calm, and used to sleeping indoors, they may adapt well to sleeping in a tent.
- If your dog is restless, anxious, or has a tendency to wander, it might be challenging to have them in the tent.
- Size of the Tent:
- The size of your tent matters. If you have a small tent, accommodating both you and your dog may be cramped and uncomfortable.
- Larger tents can provide more space for both of you.
- Temperature:
- Consider the temperature and weather conditions.
- In colder weather, your dog’s body heat can help keep the tent warmer, but in warmer weather, it might be uncomfortable for both you and your dog.
- Allergies:
- If you or someone else in your party has allergies, be mindful that having a dog in the tent may exacerbate allergies, especially if the tent is a confined space.
- Cleanliness:
- Dogs can bring dirt, mud, and potentially ticks into the tent.
- If cleanliness is a concern, you might want to have a designated area for your dog outside the tent or bring a mat or blanket to place inside for them.
- Training:
- Ensure your dog is well-trained, especially in terms of commands like “stay” and “come.”
- This is important for managing your dog inside the tent and around the campsite.
- Comfort:
- Prioritize your dog’s comfort. Bring their bed or a pad to provide a comfortable sleeping area.
- This can also help contain any shedding.
- Noise:
- Some dogs may react to nighttime sounds, potentially disturbing your sleep.
- If your dog is particularly vocal, this could be a consideration.
Ultimately, the decision to have your dog sleep in the tent with you depends on your specific circumstances and the nature of your dog. If you’re unsure, you might consider a trial run in your backyard or a controlled camping environment to see how your dog reacts to sleeping in a tent before committing to a longer camping trip.
5. Do dogs get cold in tents?
Yes, dogs can get cold in tents, especially if the temperature drops during the night or if you’re camping in colder weather conditions.
Here are some factors to consider to ensure your dog stays warm in the tent:
- Dog’s Size and Coat:
- Smaller dogs or those with short coats may be more susceptible to cold temperatures.
- Breeds with thicker fur may be better equipped to handle cooler conditions.
- Sleeping Surface:
- Elevate your dog’s sleeping area off the cold ground.
- Most seasoned campers know that sleeping directly on the ground will pull the heat from your body into the ground while your body absorbs the cold on the ground.
- Because of this, use a dog bed, pad, or blanket to provide insulation and prevent direct contact with the cold surface.
- Doggy Sleeping Bag:
- Consider using a doggy sleeping bag or a blanket specifically designed for dogs.
- These can help retain your dog’s body heat.
- Shared Body Heat:
- If your dog is comfortable with it, allowing them to sleep close to you can provide additional warmth.
- Dogs generate body heat, and sharing a sleeping space can help keep both of you warmer while also strengthening your bond with Fido.
- Warmth from Below:
- If camping in colder conditions, bring a thermally insulated sleeping pad for your dog.
- This will help prevent heat loss to the ground.
- Doggy Apparel:
- In colder weather, consider dressing your dog in a doggy sweater or jacket to provide an extra layer of insulation.
- Doggy boots or shoes are great for keeping their paws dry and warm.
- Ventilation:
- While it’s important to stay warm, also ensure that there is proper ventilation in the tent to prevent condensation.
- Moisture can make the environment feel colder.
- Check the Weather Forecast:
- Before you go camping, check the weather forecast for the camping area.
- This will help you prepare for potential temperature drops during the night. This will also help keep mold down and an overall healthier environment.
- Emergency Blanket:
- Bring an emergency blanket for additional insulation if needed.
- In extreme conditions, you can place the emergency blanket under your dog’s bedding for added warmth.
- Observe Your Dog:
- Pay attention to your dog’s behavior.
- If they seem uncomfortable, restless or they are shivering, take steps to provide more warmth immediately.
Remember that individual dogs have different tolerances to cold, so it’s essential to know your dog’s needs and preferences. Additionally, if the weather is too extreme, it may be best to reconsider camping with your dog or take extra precautions to ensure their comfort and safety.

6. Can you leave a dog alone in a tent?
Leaving a dog alone in a tent depends on various factors, and it’s generally not recommended for extended periods due to potential risks.
Here are some things to consider:
- Behavior and Training:
- Consider your dog’s behavior and training.
- If your dog is well-behaved, non-destructive, and comfortable in the tent, leaving them alone for short periods may be feasible.
- Duration:
- The length of time you leave your dog alone matters.
- Leaving a dog alone for a short period, such as a few minutes, may be different from leaving them alone for an extended time.
- This is especially important if your dog has anxiety or is a high-energy pup.
- Temperature:
- Consider the weather conditions. If it’s hot outside, the interior of the tent can quickly become too hot, posing a risk of heat-related issues.
- Especially when closed up to keep your pooch in.
- Lack of air circulation can result in overheating in a matter of just a few minutes in high-temperature conditions.
- In cold weather, your dog may become cold if left alone without proper insulation.
- The colder the weather, the higher the risks are in a shorter period.
- Secure Environment:
- Ensure the tent is secure and escape-proof.
- Dogs may attempt to get out of the tent if they become anxious or if they see something outside that excites them.
- Make sure the tent zippers are secure and that your dog cannot accidentally damage the tent.
- Leaving any opening so that a dog can poke their nose out could lead to an escape.
- Distractions:
- Provide your dog with distractions, such as toys or treats, to keep them occupied while you’re away.
- This will keep anxiety down and bring down the chance that your pup will try to escape.
- Prior Experience:
- If it’s the first time your dog is in a tent, it might be a good idea to spend some time acclimating them to the environment before leaving them alone.
- Comfort Items:
- Ensure your dog has familiar and comforting items in the tent, such as their bed or a favorite toy.
- Noise Level:
- Consider the noise level in the camping area.
- If there are loud or unexpected noises, your dog may become anxious.
- Leash or Enclosed Area:
- If you need to leave your dog alone for a short time, consider securing them on a leash near the tent or setting up a temporary enclosed area.
- This provides them with some freedom while preventing them from wandering off.
- Check Local Regulations:
- Check the campground or park regulations regarding leaving dogs unattended.
- Some places may have specific rules about this.
It’s important to note that every dog is different, and what works for one dog may not work for another. Always prioritize your dog’s safety, comfort, and well-being. If you anticipate needing to leave your dog alone for an extended period, it might be a better idea to arrange for someone to watch over them or consider alternative options.
7. What temperature can a dog camp in?
The ability of a dog to camp comfortably depends on several factors, including the dog’s breed, size, coat type, age, and overall health. Different dogs have different tolerances to temperature extremes. However, here are some general guidelines:
- Cold Weather:
- Many dogs can tolerate cold weather well, especially those with thick coats. Breeds adapted to colder climates, such as Siberian Huskies or Alaskan Malamutes, may be more comfortable in colder temperatures.
- Most dogs can handle temperatures just above freezing with proper bedding and insulation.
- Provide your dog with a warm, insulated bed or pad inside the tent to prevent them from getting cold on the ground.
- For smaller or short-haired breeds, consider using a doggy sweater or jacket in colder temperatures.
- Hot Weather:
- Dogs are more susceptible to heat than cold. In hot weather, it’s crucial to prevent heat-related issues, such as heatstroke.
- Avoid camping in extreme heat, especially if your dog is not acclimated to high temperatures.
- Provide ample shade, and ensure your dog has access to fresh water at all times.
- Avoid strenuous activities during the hottest parts of the day.
- Moderate Temperatures:
- Many dogs are comfortable camping in temperatures ranging from 50°F to 80°F (10°C to 26°C).
- Always monitor your dog for signs of discomfort, such as excessive panting, lethargy, or restlessness.
- Senior Dogs and Puppies:
- Senior dogs and puppies may be more sensitive to temperature extremes.
- Monitor them closely and provide extra care and attention.
- Health Conditions:
- Dogs with certain health conditions, such as respiratory problems or arthritis, may be more sensitive to temperature changes.
- Consult with your veterinarian if you have concerns about your dog’s ability to handle specific weather conditions.
Your dog’s breed can be a major factor as well. Here is a list of dogs that tend to do better in cold and hot weather.

Cold weather dog breeds:
Certain dog breeds are better equipped to tolerate cold weather due to their genetic adaptations, including thicker fur, insulating undercoats, and body structures that conserve heat. Here are some cold-tolerant dog breeds:
- Siberian Husky:
- Originally bred by the Chukchi people of Siberia, Siberian Huskies have a thick double coat that insulates them in cold climates.
- They are known for their endurance and ability to withstand freezing temperatures.
- Alaskan Malamute:
- Similar to the Siberian Husky, the Alaskan Malamute is a powerful and robust breed developed for pulling heavy sleds in harsh Arctic conditions.
- Their dense coat provides insulation against the cold.
- Bernese Mountain Dog:
- With a thick, long coat, Bernese Mountain Dogs are well-suited for colder climates.
- They were originally bred as farm dogs in the Swiss Alps, where they worked in cold weather.
- Newfoundland:
- Known for their water rescue abilities, Newfoundlands have a water-resistant double coat that helps them stay warm even when wet.
- Their size and strength make them well-suited for cold climates.
- Tibetan Mastiff:
- Originating from the Himalayan region, Tibetan Mastiffs have a dense, weather-resistant coat that provides insulation against cold temperatures.
- They were traditionally used to guard livestock in mountainous terrain.
- Samoyed:
- Samoyeds have a luxurious, dense coat that keeps them warm in frigid conditions.
- They were originally bred by the Samoyede people of Siberia for herding reindeer and pulling sleds.
- Norwegian Elkhound:
- The Norwegian Elkhound is a hardy and resilient breed with a thick, weather-resistant coat.
- They were developed in Norway for hunting in cold climates.
- Akita:
- Akitas have a dense double coat that protects them from harsh weather.
- They originated in the mountainous northern regions of Japan and were bred for hunting in cold conditions.
- Keeshond:
- The Keeshond has a plush double coat that provides insulation against the cold.
- They are a spitz-type breed originally from the Netherlands.
- Shiba Inu:
- Shiba Inus have a dense double coat that helps them tolerate cold temperatures.
- They are a small and agile Japanese breed.
Keep in mind that while these breeds may be more naturally equipped for colder weather, individual tolerance can vary. Additionally, it’s essential to provide proper care, shelter, and attention to any dog, regardless of their breed, when exposed to extreme temperatures.
Warm weather dog breeds:
Certain dog breeds are more heat-tolerant due to their physical characteristics, such as shorter muzzles, lighter coats, and adaptations for warmer climates. Here are some heat-tolerant dog breeds:
- Basenji:
- Basenjis have a short coat and are known for their clean and groomed appearance.
- They originated in Africa and are well-adapted to warmer climates.
- Chihuahua:
- Chihuahuas are a small breed with a short coat, making them well-suited for warmer weather.
- They can be sensitive to extreme cold and often seek warm spots.
- Greyhound:
- Greyhounds have a thin coat and a lean build, which helps dissipate heat.
- They are well-suited for warmer temperatures.
- Dalmatian:
- Dalmatians have a short coat with distinctive spots.
- Their coat and lean build make them relatively heat-tolerant.
- Whippet:
- Similar to Greyhounds, Whippets have a thin coat and a streamlined build that makes them better suited for warmer weather.
- Italian Greyhound:
- Italian Greyhounds are small, with a short coat and a lean physique.
- They are well-adapted to warmer climates.
- Australian Cattle Dog:
- Australian Cattle Dogs have short, weather-resistant coats.
- They are known for their endurance and ability to work in various climates.
- Vizsla:
- Vizslas have a short, dense coat that helps regulate their body temperature.
- They are an energetic breed that can handle warmer temperatures.
- Pharaoh Hound:
- Originating from Malta, the Pharaoh Hound has a short coat and a slender build, making it well-suited for warm climates.
- Rhodesian Ridgeback:
- Rhodesian Ridgebacks have a short and sleek coat.
- They were originally bred in Africa and are known for their heat tolerance.
It’s important to note that while certain breeds may be more heat-tolerant, individual dogs can have varying tolerance levels. Additionally, responsible care and attention to the well-being of all dogs are crucial in warm weather. Provide access to shade, fresh water, and avoid strenuous activities during the hottest parts of the day. Always be mindful of signs of heat stress, such as excessive panting, lethargy, or difficulty breathing, and take appropriate measures to cool the dog down if needed.
Always check the weather forecast before camping with your dog, and be prepared to make adjustments based on the conditions. If you’re unsure about your dog’s ability to handle the temperature, it’s better to err on the side of caution and choose camping dates and locations that are more suitable for their well-being.
8. What is the danger zone temperature for a dog?
The danger zone temperature for dogs, also known as the temperature range in which they are most susceptible to heat-related issues, is typically considered to be between 90°F (32°C) and 100°F (37.8°C). In this temperature range, dogs are at an increased risk of heat stress, heat exhaustion, and heatstroke.
Here’s a breakdown of the danger zone and associated risks:
- Mild Risk (90-95°F / 32-35°C):
- Dogs may start to experience discomfort, increased panting, and mild dehydration.
- Moderate Risk (95-100°F / 35-37.8°C):
- The risk of heat-related issues becomes more significant.
- Dogs may exhibit signs of heat exhaustion, such as heavy panting, weakness, and increased heart rate.
- Dehydration becomes more pronounced, and there is an increased risk of progressing to heatstroke.
- High Risk (Above 100°F / 37.8°C):
- Dogs are at a high risk of heatstroke.
- Heatstroke is a life-threatening condition characterized by a body temperature exceeding 104°F (40°C).
- Symptoms may include collapse, seizures, vomiting, diarrhea, and potential organ failure.
It’s important to note that individual dogs may have different tolerances to heat based on factors such as breed, age, health, and acclimatization. Additionally, humidity levels can affect a dog’s ability to cool down through panting, making high humidity more challenging for dogs to dissipate heat.
Preventive measures to protect dogs from heat-related issues include:
- Provide Shade:
- Ensure that your dog has access to shaded areas, especially during the hottest parts of the day.
- Fresh Water:
- Always provide a constant supply of fresh, cool water for your dog.
- Avoid Strenuous Exercise:
- Limit exercise and outdoor activities during peak heat hours. Early morning or late evening walks are preferable.
- Cooling Solutions:
- Use cooling mats, vests, or wet towels to help your dog stay cool.
- Never Leave in a Hot Car:
- Never leave your dog in a parked car, even with the windows cracked.
- Temperatures inside a car can rise rapidly and become lethal.
- Monitoring Signs of Heat Stress:
- Be vigilant for signs of heat stress or heatstroke.
- If you notice any symptoms, move your dog to a cooler place and seek veterinary attention immediately.
Understanding your dog’s specific needs and being proactive in preventing heat-related issues is crucial, especially during hot weather conditions.
9. What should dogs sleep in when camping?
When camping with your dog, it’s important to provide them with a comfortable and safe sleeping arrangement.
Here are some options for what dogs can sleep in when camping:
- Dog Sleeping Bag:
- There are sleeping bags specifically designed for dogs, providing insulation and warmth.
- These bags are often lightweight and portable.
- Camping Mat or Pad:
- Place a camping mat or pad inside the tent to provide a barrier between your dog and the cold ground.
- This helps insulate them and provides a more comfortable sleeping surface.
- Portable Dog Bed:
- Bring a portable dog bed that is easy to transport and provides a familiar and comfortable sleeping space for your dog.
- Look for beds with water-resistant or waterproof materials.
- Blankets or Towels:
- Pack a few blankets or towels to provide additional warmth and comfort.
- You can place these on top of a camping mat or inside a dog bed.
- Elevated Dog Cot:
- An elevated dog cot can keep your dog off the ground, providing insulation and preventing contact with cold or damp surfaces.
- Dog Tent or Shelter:
- If your dog is comfortable in their own space, consider setting up a small dog tent or shelter within the larger tent.
- This can give them a cozy and secure place to sleep.
- Your Sleeping Bag (if appropriate):
- In certain conditions, you might allow your dog to share your sleeping bag for added warmth, especially if they are a smaller breed.
- Ensure that the sleeping bag is large enough for both of you and that your dog is comfortable with this arrangement.
- Insulated Doggy Sweater or Jacket:
- In colder weather, consider dressing your dog in a doggy sweater or jacket to provide extra warmth while they sleep.
- Rainfly or Tarp:
- If there’s a chance of rain, use a rainfly or tarp over the tent to prevent water from leaking inside.
- This helps keep your dog and their bedding dry.
- Comfort Items:
- Bring your dog’s favorite toys or comfort items to make them feel more at ease in the camping environment.
Before heading out, ensure that your dog is familiar with their sleeping setup. Consider doing a trial run in your backyard or a controlled environment to see how they react to the camping gear. Additionally, always check the weather forecast and prepare accordingly to keep your dog comfortable in different conditions.

10. Does my dog need a blanket when camping?
Whether or not your dog needs a blanket when camping depends on several factors, including the weather, your dog’s breed, and their comfort level.
Here are some considerations:
- Temperature:
- In colder weather, a blanket can provide additional insulation and help keep your dog warm.
- Breeds with short coats or those that are not naturally suited to cold temperatures may benefit from a blanket during chilly nights.
- Dog’s Comfort:
- Some dogs enjoy the added comfort and security of having a blanket to snuggle with, especially if they are used to having one at home.
- It can provide a familiar and cozy feeling in a new camping environment.
- Insulation from the Ground:
- Even if the air temperature is not extremely cold, the ground can be cooler, especially at night.
- Placing a blanket or pad under your dog can provide insulation and prevent heat loss through contact with the cold ground.
- Rain Protection:
- In wet conditions, a waterproof or water-resistant blanket can help keep your dog dry.
- Make sure the blanket is made of materials that repel water and not absorb it.
- Size and Breed:
- Consider the size and breed of your dog.
- Smaller or short-haired breeds may be more susceptible to the cold, making a blanket a valuable addition to their sleeping area.
- Your Dog’s Behavior:
- Observe your dog’s behavior.
- If they tend to burrow or seek out soft spots to lie down at home, they might appreciate having a blanket in their camping setup.
- Personal Preference:
- Some dogs may not be interested in using a blanket and may prefer to sleep without one.
- If your dog seems comfortable without a blanket, it may not be necessary.
When camping with your dog, it’s a good idea to bring a blanket and observe your dog’s behavior. If they appear cold or uncomfortable, you can offer the blanket for added warmth and comfort. Conversely, if your dog seems content and is not showing signs of discomfort, they may not need a blanket.
Always be mindful of the weather conditions and adjust your dog’s sleeping arrangements accordingly to ensure their well-being and comfort during the camping trip.
11. Does my dog need a sleeping bag?
Whether or not your dog needs a sleeping bag when camping depends on various factors, including the weather, your dog’s breed, and your personal preferences. Here are some considerations:
- Temperature:
- If you’re camping in colder weather, a dog sleeping bag can provide additional insulation and help keep your dog warm during chilly nights.
- Breeds with short coats or those not naturally adapted to colder temperatures may benefit from the extra warmth.
- Dog’s Size and Breed:
- Smaller or short-haired breeds may be more susceptible to the cold, making a sleeping bag a valuable addition to their camping gear.
- Insulation from the Ground:
- A dog sleeping bag can provide insulation from the cold ground, preventing heat loss through contact with the chilly surface.
- Comfort and Security:
- Some dogs appreciate the comfort and security of having their own sleeping space.
- A dog sleeping bag can create a cozy and familiar environment for your dog, making them feel more at ease in a new camping setting.
- Waterproofing:
- If there’s a chance of rain or damp conditions, consider a waterproof or water-resistant dog sleeping bag to keep your pet dry.
- Dog’s Behavior:
- Observe your dog’s behavior. If they like to burrow or nestle into soft spots, they may enjoy having a sleeping bag.
- Size and Portability:
- Choose a sleeping bag that is appropriately sized for your dog and easy to pack for your camping trip.
- Look for lightweight and compact options that are suitable for outdoor adventures.
- Trial Run:
- If it’s your dog’s first time using a sleeping bag, consider doing a trial run in your backyard or a controlled environment to see how they react.
- Your Tent Setup:
- Consider the size of your tent and how your dog will fit into the sleeping arrangement.
- Make sure there’s enough space for both you and your dog without compromising comfort.
While a dog sleeping bag can be a useful accessory for camping, it’s not a necessity for every dog. Some dogs are comfortable sleeping without additional gear, while others may benefit from the extra warmth and security provided by a sleeping bag. Assess your dog’s individual needs, camping conditions, and choose the gear that best suits your dog’s comfort and well-being.
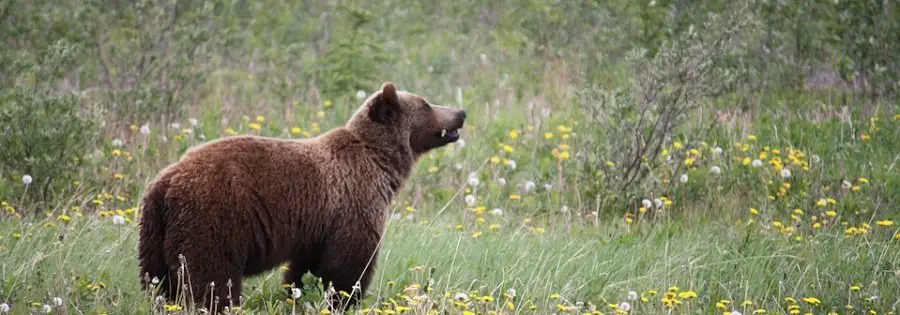
12. Does camping with a dog attract bears?
Camping with a dog can attract bears, as the scent of a dog may pique a bear’s curiosity. However, there are several factors to consider regarding the impact of camping with a dog on bear encounters:
- Scent:
- Bears have an acute sense of smell, and the scent of a dog may attract their attention.
- Dogs have a natural scent, and the odors associated with their food, waste, and belongings may be appealing to bears.
- Barking:
- The sound of a barking dog can alert bears to the presence of humans in the area.
- In some cases, bears may be curious and investigate, while in other situations, they may be deterred by the noise.
- Size of the Dog:
- Larger dogs may be perceived as a potential threat by bears and may be more effective in deterring them.
- However, smaller dogs may be seen as prey or may not intimidate bears.
- Training and Behavior:
- A well-behaved and trained dog may be less likely to attract bears, as they are less likely to behave in a way that would provoke curiosity or aggression from wildlife.
- Bear Country Precautions:
- If you are camping in bear country, take proper precautions regardless of whether you have a dog with you.
- This includes storing food securely, using bear-resistant containers, and following guidelines for bear safety.
- Leash Regulations:
- Check the camping area’s regulations regarding dogs and leash requirements.
- Some areas may require dogs to be on a leash to minimize the potential for interactions with wildlife.
- Dog Food Storage:
- Store your dog’s food securely to avoid attracting bears.
- Just like human food, dog food can be appealing to wildlife.
- Behavior During Bear Encounters:
- If you encounter a bear while camping with your dog, remain calm and avoid confrontation.
- Keep your dog on a leash and back away slowly, giving the bear plenty of space to leave the area.
It’s essential to research the specific camping area you plan to visit, understand the local wildlife, and follow the recommended guidelines for camping in Bear Country. Additionally, being aware of your dog’s behavior and taking steps to minimize their impact on the environment can contribute to a safer and more enjoyable camping experience for both you and the wildlife in the area.
13. How do I keep my dog quiet while camping?
Keeping your dog quiet while camping is important for both your enjoyment and the consideration of others in the camping area.
Here are some tips to help keep your dog quiet during a camping trip:
- Pre-trip Training:
- Before the camping trip, work on basic obedience commands with your dog.
- Commands like “quiet” or “enough” can be helpful in controlling barking.
- Familiarize Your Dog with Camping Gear:
- Introduce your dog to camping gear, such as the tent and sleeping arrangements, in a familiar and controlled environment before the trip.
- This helps them feel more comfortable during the actual camping experience.
- Bring Familiar Items:
- Bring your dog’s familiar toys, bedding, and comfort items.
- Having familiar scents can help keep them calm in the new environment.
- Exercise Before Camping:
- Ensure your dog gets plenty of exercise before settling down for the night.
- A tired dog is more likely to be calm and less prone to excessive barking.
- Use a Leash and Tether:
- Keep your dog on a leash or tether during quiet hours or when they are more likely to bark at wildlife or other campers.
- This gives you control over their movements.
- Observe and Address Triggers:
- Pay attention to what triggers your dog’s barking.
- Is it wildlife, other dogs, or unfamiliar sounds?
- Addressing specific triggers can help minimize barking.
- Create a Comfortable Sleeping Area:
- Set up a comfortable and secure sleeping area for your dog inside the tent.
- This can help them feel safe and reduce anxiety, potentially minimizing barking.
- Reward Quiet Behavior:
- Praise and reward your dog when they are quiet.
- Positive reinforcement can reinforce good behavior.
- Provide Mental Stimulation:
- Bring toys or engage your dog in mentally stimulating activities during downtime.
- Mental stimulation can help keep them occupied and less likely to bark out of boredom.
- Consider White Noise:
- If your dog is sensitive to noises in the camping area, consider bringing a white noise machine or playing calming music to drown out external sounds.
- Stay Calm:
- Dogs can pick up on their owner’s emotions.
- If you remain calm and relaxed, your dog is more likely to do the same.
- Practice Camping Etiquette:
- Be considerate of other campers.
- If your dog tends to bark, choose a campsite that provides some distance from other campers or camp in an area where dog noise is more acceptable.
Remember that barking is a natural behavior for dogs, and some level of noise is expected. However, excessive barking can be disruptive, so it’s essential to address the behavior while still ensuring your dog is comfortable and happy during the camping trip.
14. Is camping stressful for dogs?
Camping can be both exciting and potentially stressful for dogs, depending on their temperament, previous experiences, and the camping environment.
Here are some factors to consider:
1. Novelty and New Environments:
- Dogs may find the new sights, sounds, and smells of a camping environment stimulating and intriguing.
- However, some dogs may be stressed by the novelty of the surroundings.
2. Socialization and Interaction:
- Camping may involve encounters with other dogs, wildlife, or new people.
- Some dogs thrive on socialization, while others may feel anxious or stressed in unfamiliar social settings.
3. Routine Disruption:
- Dogs are creatures of habit, and any disruption to their routine can cause stress.
- Camping often involves changes in feeding times, walking schedules, and sleeping arrangements, which may impact your dog’s comfort.
4. Sleeping Conditions:
- Sleeping in a tent or a different environment may be a new experience for your dog.
- The unfamiliar sounds, smells, and sensations can be either exciting or stressful for them.
5. Weather Conditions:
- Extreme weather conditions, whether it’s heat, cold, rain, or wind, can impact your dog’s comfort.
- It’s crucial to ensure that your dog is adequately protected from the elements.
6. Leash and Tethering:
- Some dogs may feel restricted or stressed when kept on a leash or tethered.
- It’s essential to strike a balance between keeping your dog safe and allowing them some freedom.
7. Training and Behavior:
- Dogs that are well-trained and have positive associations with new experiences are more likely to handle camping well.
- However, dogs with anxiety or behavioral issues may find camping more stressful.
8. Owner’s Energy:
- Dogs are highly attuned to their owner’s emotions.
- If you are stressed or anxious, your dog may pick up on those feelings, affecting their stress levels.
Tips to Minimize Stress:
- Gradual Introduction:
- Introduce your dog to camping gradually, starting with short trips or backyard camping to help them acclimate to the new environment.
- Familiar Items:
- Bring familiar items such as your dog’s bed, toys, and blankets to create a sense of comfort and security.
- Positive Reinforcement:
- Use positive reinforcement to reward calm and relaxed behavior.
- This can help create positive associations with the camping experience.
- Respect Your Dog’s Limits:
- Pay attention to your dog’s cues and respect their limits.
- If they show signs of stress, provide a quiet space for them to retreat.
- Maintain Routine:
- Keep certain aspects of your dog’s routine consistent, such as feeding times and play sessions, to provide a sense of normalcy.
- Comfort and Safety:
- Ensure that your dog has a comfortable and safe sleeping area, protection from extreme weather, and access to fresh water.
Remember that each dog is unique, and what may be stressful for one dog could be enjoyable for another. By paying attention to your dog’s behavior, providing positive experiences, and gradually introducing them to the camping environment, you can help minimize stress and make camping an enjoyable adventure for both you and your furry friend.
We want to hear from you!
We would love to collect more questions to give answers to. If you have a question that you would like to see us answer, be sure to ask in the comments section below.


 It’s completely normal for your tent to be really grimy, dirty, and wet after a camping trip. To extend the life of your tent, you’ll need to clean it. If your tent is moldy, then you’ll need to follow special instructions to make it safe to sleep in again.