
The open road beckons, but your rolling home deserves more than just four wheels and an engine. Transforming a basic van into a cozy, functional living space is both an art and a science.
I’ve watched countless metal boxes become stunning tiny homes, where every inch serves a purpose and every detail reflects its owner’s personality.
Camper van renovation isn’t just about building furniture—it’s about creating freedom—freedom to work remotely from mountain views, freedom to chase perfect waves, freedom to change your backyard whenever wanderlust strikes.
The journey from empty cargo space to personalized sanctuary isn’t always smooth, but with some planning, creativity, and elbow grease, your dream home-on-wheels awaits. Ready to build your escape pod?
DIY Camper Van Interior Renovation
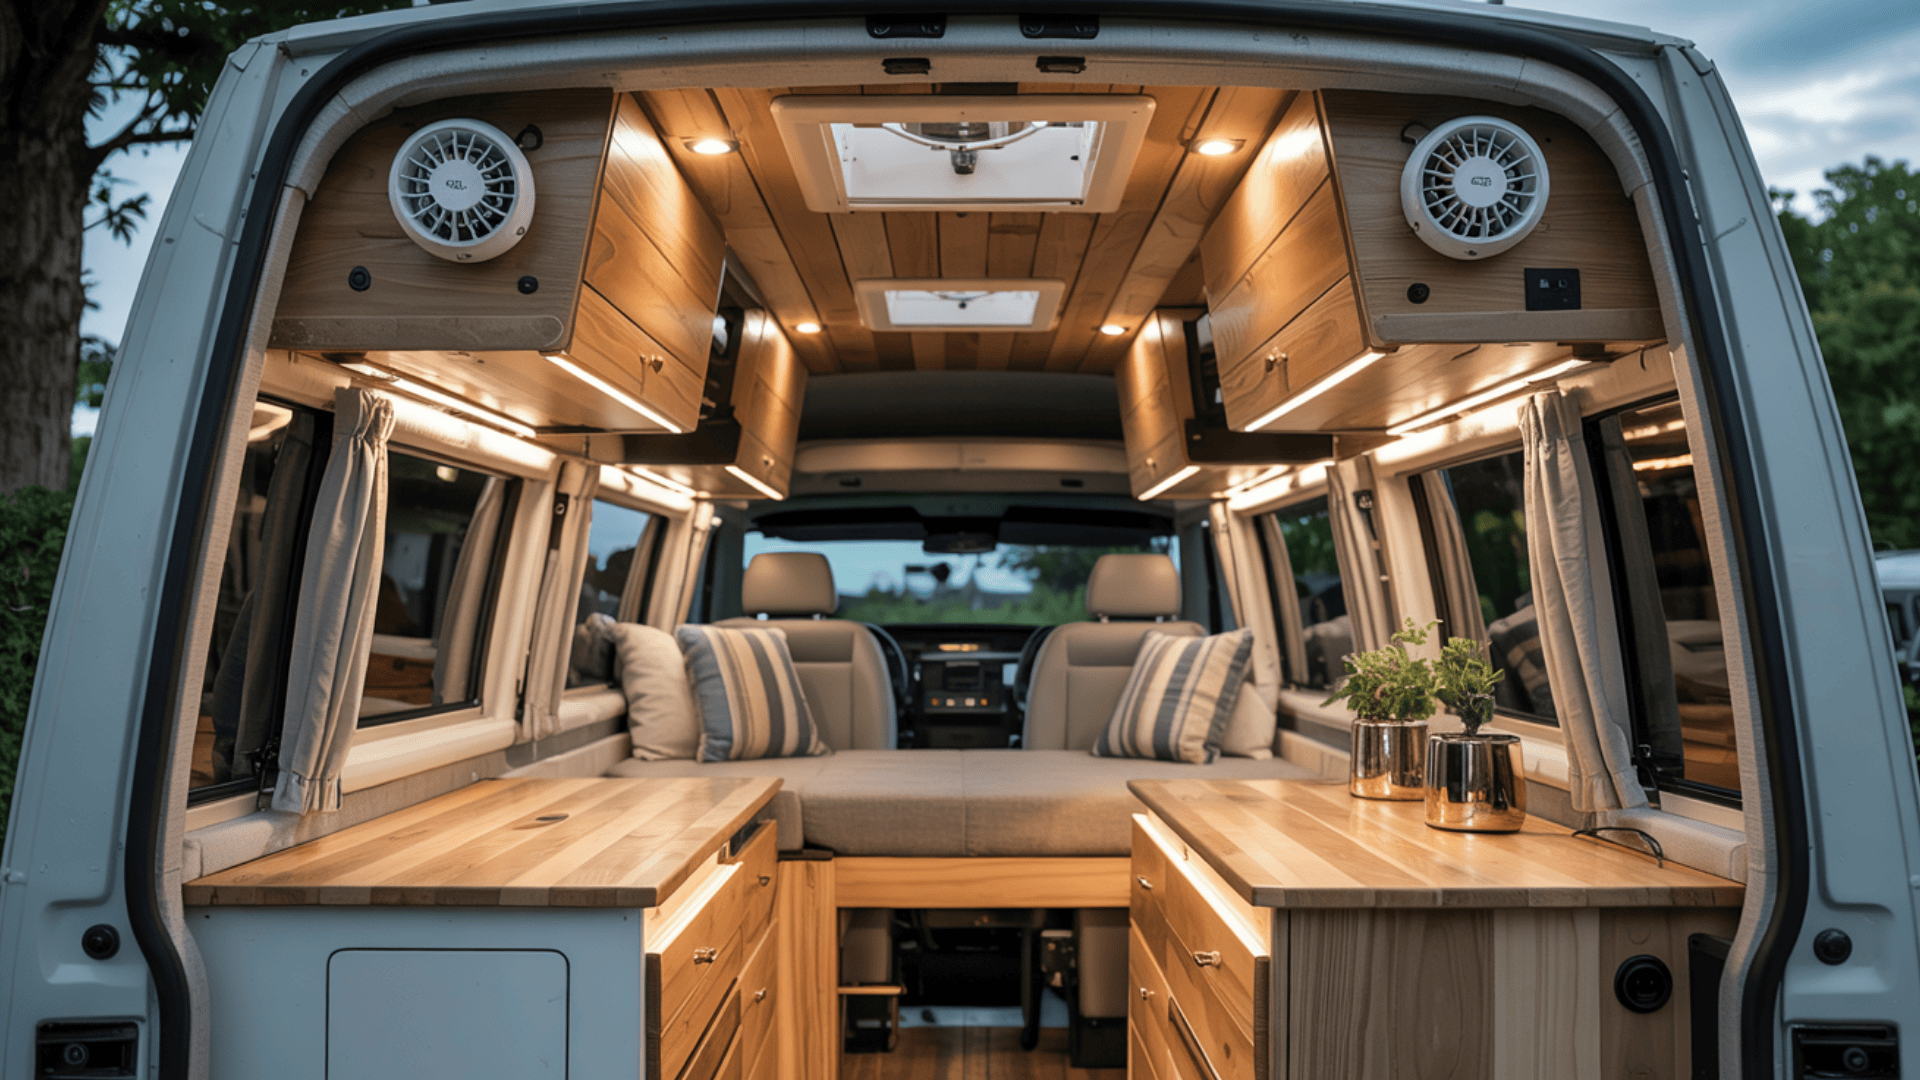
Step 1: Designing the Perfect Van Kitchen Space
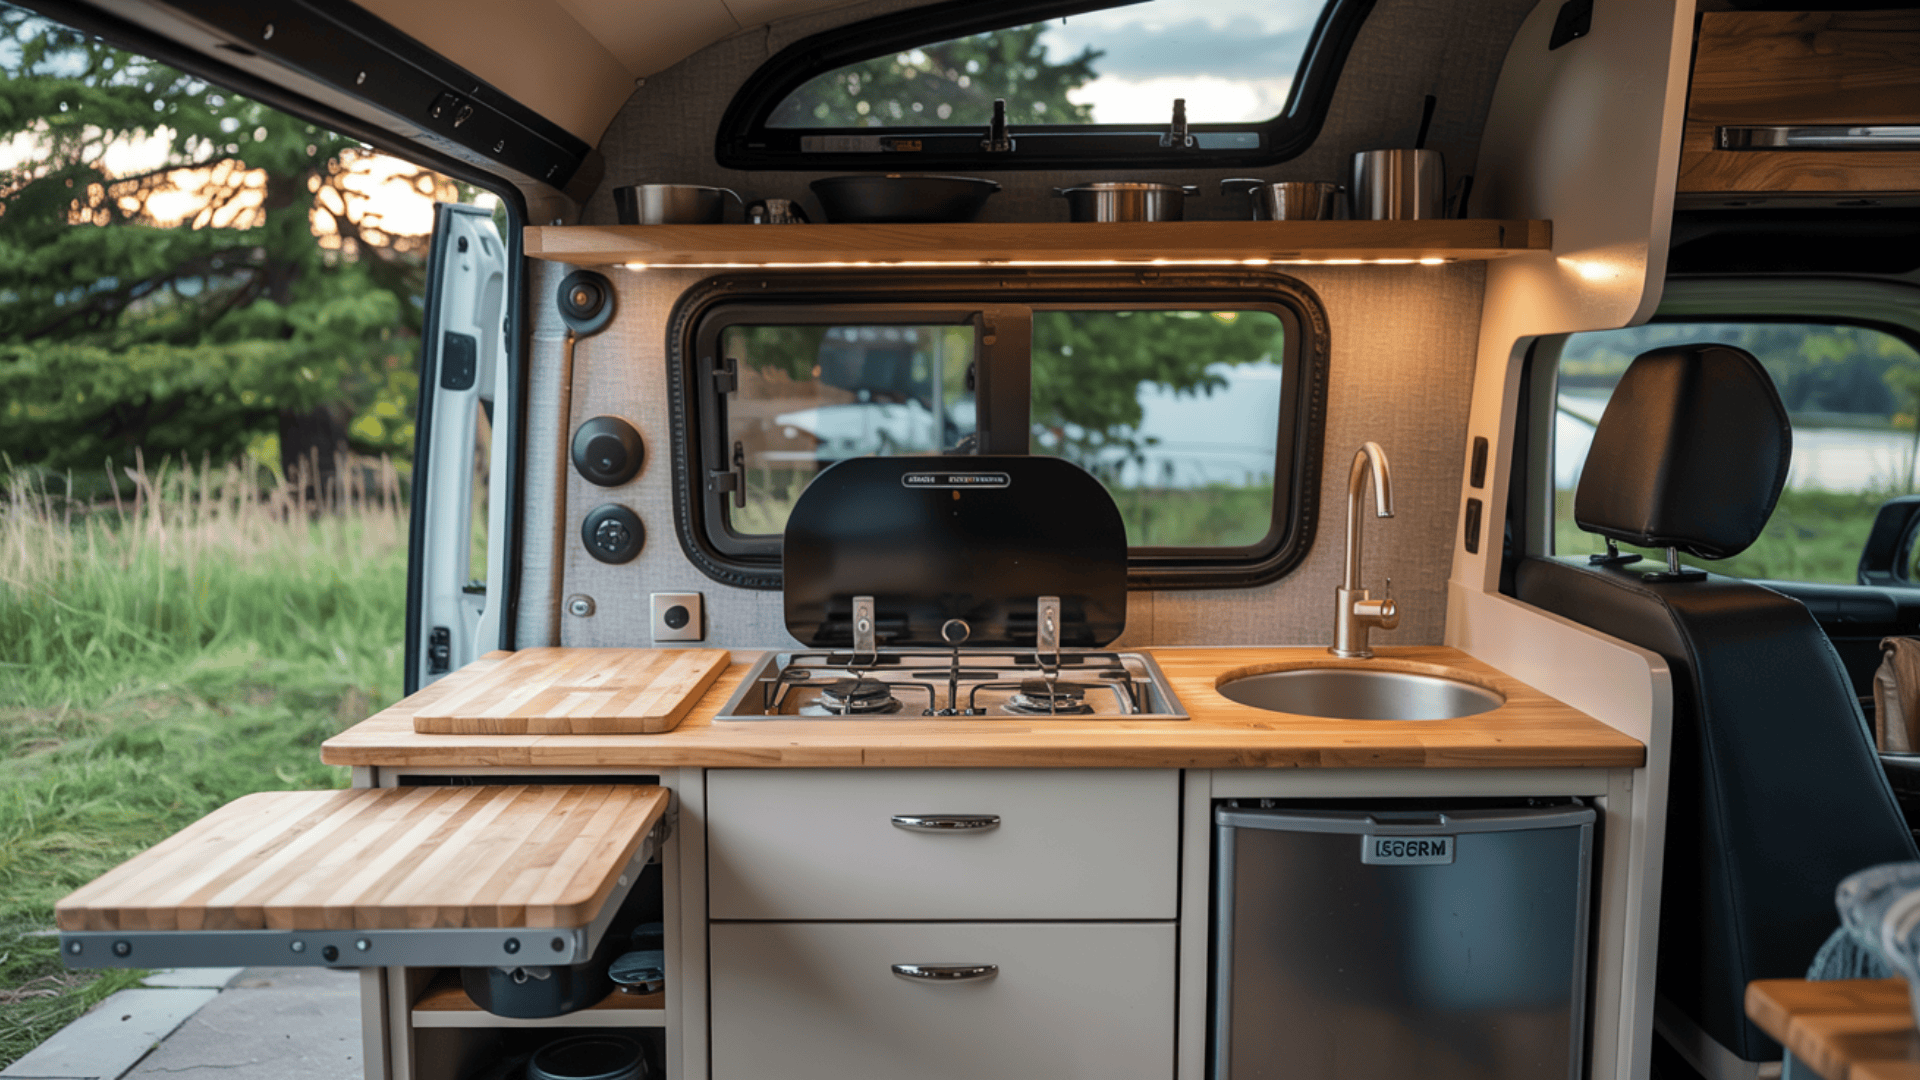
Setting up a functional kitchen in your camper van can be tricky, but it’s absolutely worth the effort. I’ve seen plenty of clever setups that make the most of limited space without sacrificing functionality.
Materials and Tools
- Butcher block countertops
- Compact propane stoves
- 12V fridge/freezers (e.g., Isotherm, Iceco)
- Cutting board sink covers
- Lagun table systems
- Flip-up counters
- Induction cooktops
- Preparation and Planning
Preparation and Planning
- Before you start building, decide whether you want an indoor kitchen, an outdoor kitchen, or both. Each has pros and cons—indoor kitchens are convenient in bad weather, but outdoor setups give you more space and keep cooking smells outside.
- Water is essential, so plan your fresh and gray water storage carefully. If you’re using propane for cooking, make sure you have safe, accessible storage that’s properly vented.
- Remember to calculate your energy needs! A typical 12V fridge might draw 2-5 amps per hour, so you’ll need enough battery capacity to run it (and your other appliances) when you’re off-grid.
Installation & Construction
Mount your sink near a window if possible—this lets you pass dishes in and out, which is super handy when you’re washing up outside. Deep sinks are better than shallow ones because they contain splashes and can hold more dirty dishes.
When installing your fridge and stove, make sure they have proper ventilation. Fridges especially need airflow to work efficiently.
Don’t forget to insulate around these appliances—it helps with energy efficiency and prevents heat transfer to your food storage.
Finishing Touches & Organization
Small organization solutions make a huge difference in van life. Built-in spice racks keep your seasonings from flying around while driving.
Utensil holders keep your cooking tools accessible but secure. Some clever van owners install overhead jar storage to maximize vertical space.
For dining, consider foldaway tables or slide-out options that can be tucked away when not in use. Bench seating with hidden storage underneath gives you a comfortable place to sit while also storing bulkier items.
Step 2: Building a Comfortable Camper Van Bedroom
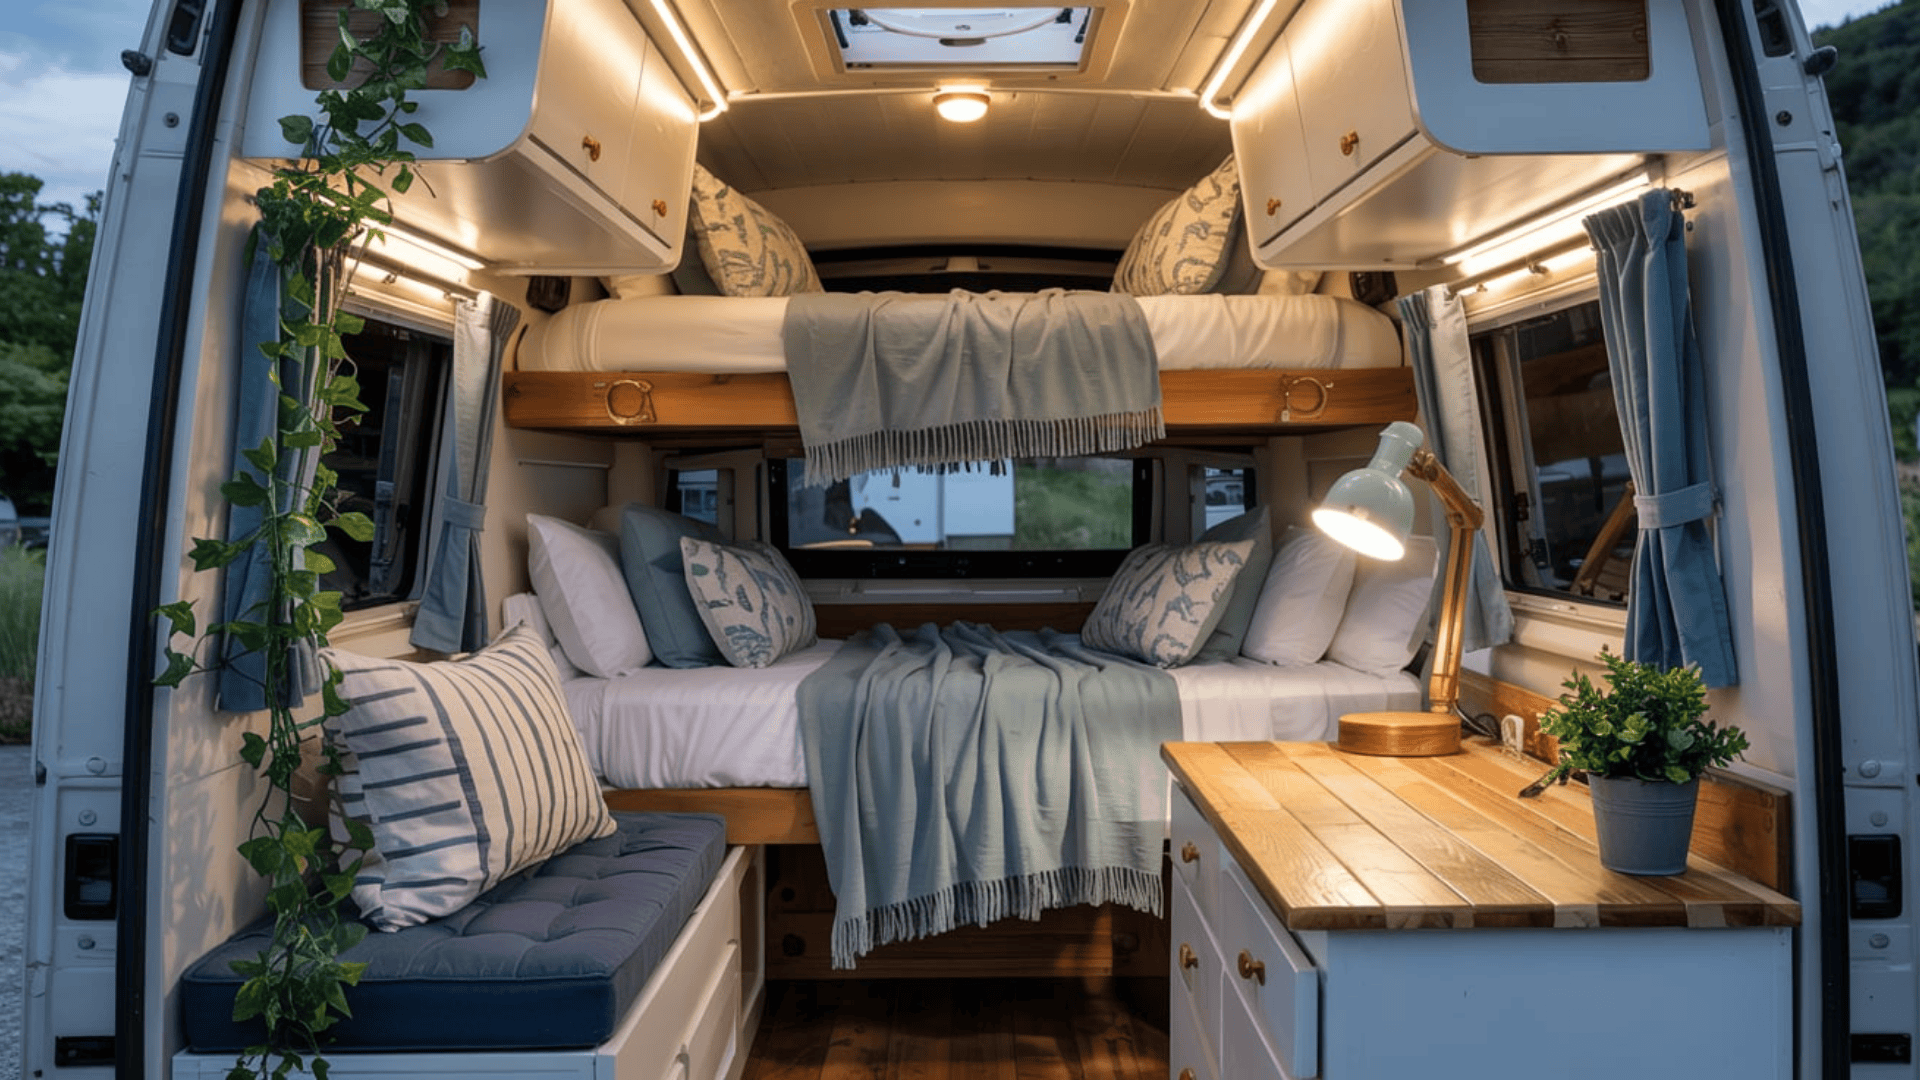
Creating a cozy sleeping space in your van is essential—after all, you’ll spend about a third of your van life catching those Zs! The right setup can make the difference between waking up refreshed or cranky on the road.
Materials and Tools
- Fixed bed platforms
- Murphy beds
- Bunk beds
- Convertible cushions
- Side flares
- Beddy’s zip-on bedding
- Cushion storage solutions
Preparation and Planning
- The big decision is fixed versus convertible. Fixed beds are always ready and offer generous “garage” storage underneath, but they take up permanent space. Convertible beds free up your living area during the day but require daily setup and breakdown.
- Remember to measure properly! Standard mattresses rarely fit perfectly in vans, so you’ll likely need custom cushions or a mattress that can be cut to size. And if you’re traveling with kids or pets, plan accordingly—maybe with small bunk spaces or dedicated pet corners.
Installation
Building a fixed bed platform is relatively straightforward. Create a sturdy frame with 2x3s or 2x4s, add crossbeams for support, and top with plywood.
The space underneath becomes valuable “garage” storage for bulky gear, which you can access via side doors or hinged tops.
For convertible options, bench seats with pull-out slat systems work well. You’ll need to install sturdy brackets and ensure everything locks in place both in bed mode and seating mode.
Murphy beds require wall-mounted brackets strong enough to support the weight while also securing the bed when stored vertically.
Finishing Touches
This is where your van becomes a home. Wall decals add personality without permanence. Blackout curtains are non-negotiable for good sleep—light pollution and privacy concerns are real in van life!
Reading lights mounted near the bed head save you from getting up when you’re ready to sleep but want to read a bit first.
Mirrors create the illusion of more space, and small wall nooks near the bed give you a place for your phone, glasses, or a small book. Throw blankets add warmth and coziness without taking up much storage space.
Step 3: Creating a Bathroom and Hygiene Zone in a Van
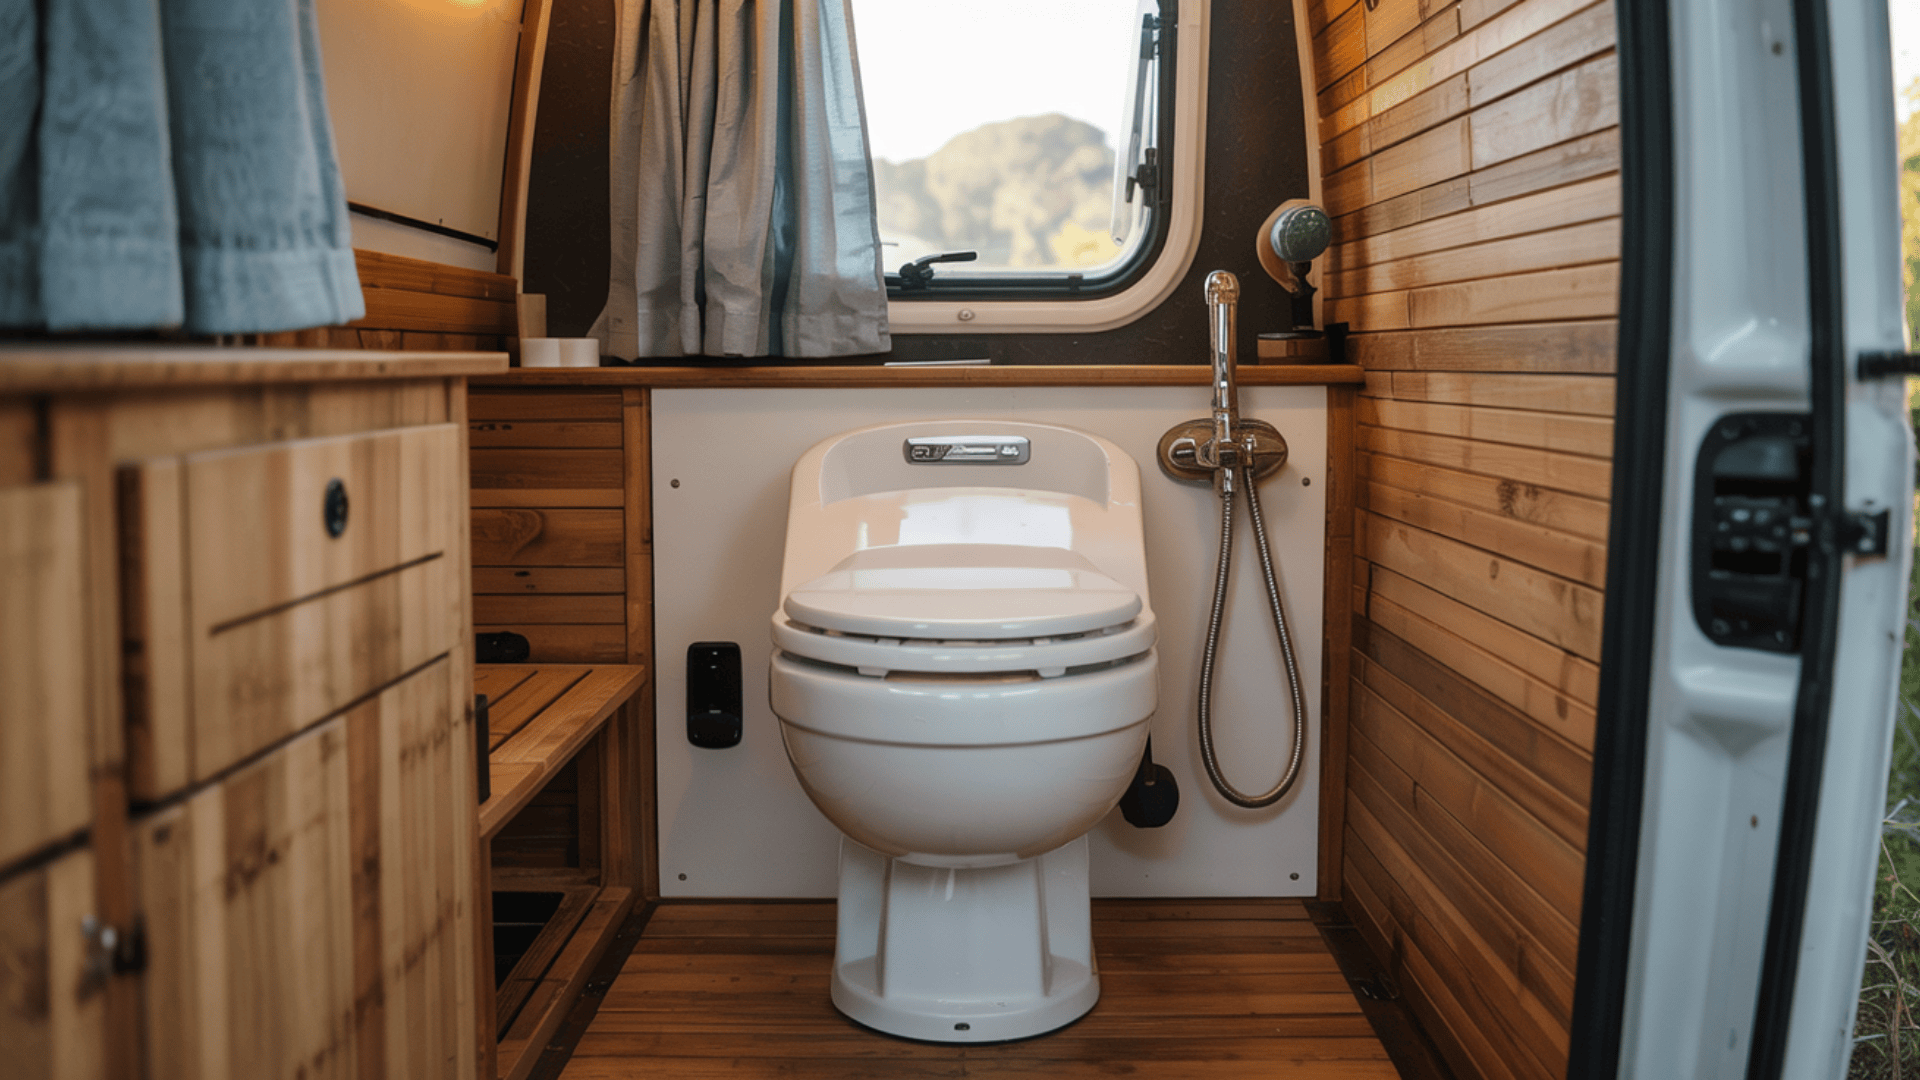
Tackling the bathroom situation is probably the most challenging part of van life for many people. It’s also where you’ll need to be really honest with yourself about your comfort needs versus space constraints.
Materials and Tools
- Cassette toilet
- Composting toilet
- Laveo dry flush
- Solar shower kits
- Bamboo shower mats
- Curtain hooks
- Outdoor shower hoses
Planning
- You have three main approaches: a dedicated indoor wet bath (like in an RV), a convertible space that serves as both shower and something else, or skipping the indoor shower entirely and going with outdoor-only options.
- Water is a big consideration. You’ll need to plan not just for freshwater storage but also for where shower water goes afterward. Some van lifers install gray water tanks, while others use simple drainage systems that can be emptied at appropriate facilities.
Installation
If you’re going with a rear shower setup, installing a showerhead at the back of your van with a privacy curtain gives you the option to shower with the doors open (in secluded areas, of course).
The floor needs to be waterproofed with proper drainage—many people build a slight slope toward the doors.
For toilets, building a simple cabinet or drawer that houses your cassette or composting toilet keeps things discreet.
Some people disguise their toilets as bench seats when not in use. Whatever you choose, make sure it’s secured for travel but accessible when needed.
Final Touches
Waterproof storage containers for toiletries prevent messes if things spill during driving. A simple towel bar or hooks gives wet towels a place to dry.
Stock up on eco-friendly, biodegradable toiletries to minimize your environmental impact, especially if you sometimes shower outdoors.
Ventilation is absolutely crucial for indoor bathroom setups. Install a fan that vents to the outside to prevent moisture buildup and potential mold issues. A small dehumidifier can also help keep things dry.
Step 4: Maximizing Storage and Living Space in Small Vans
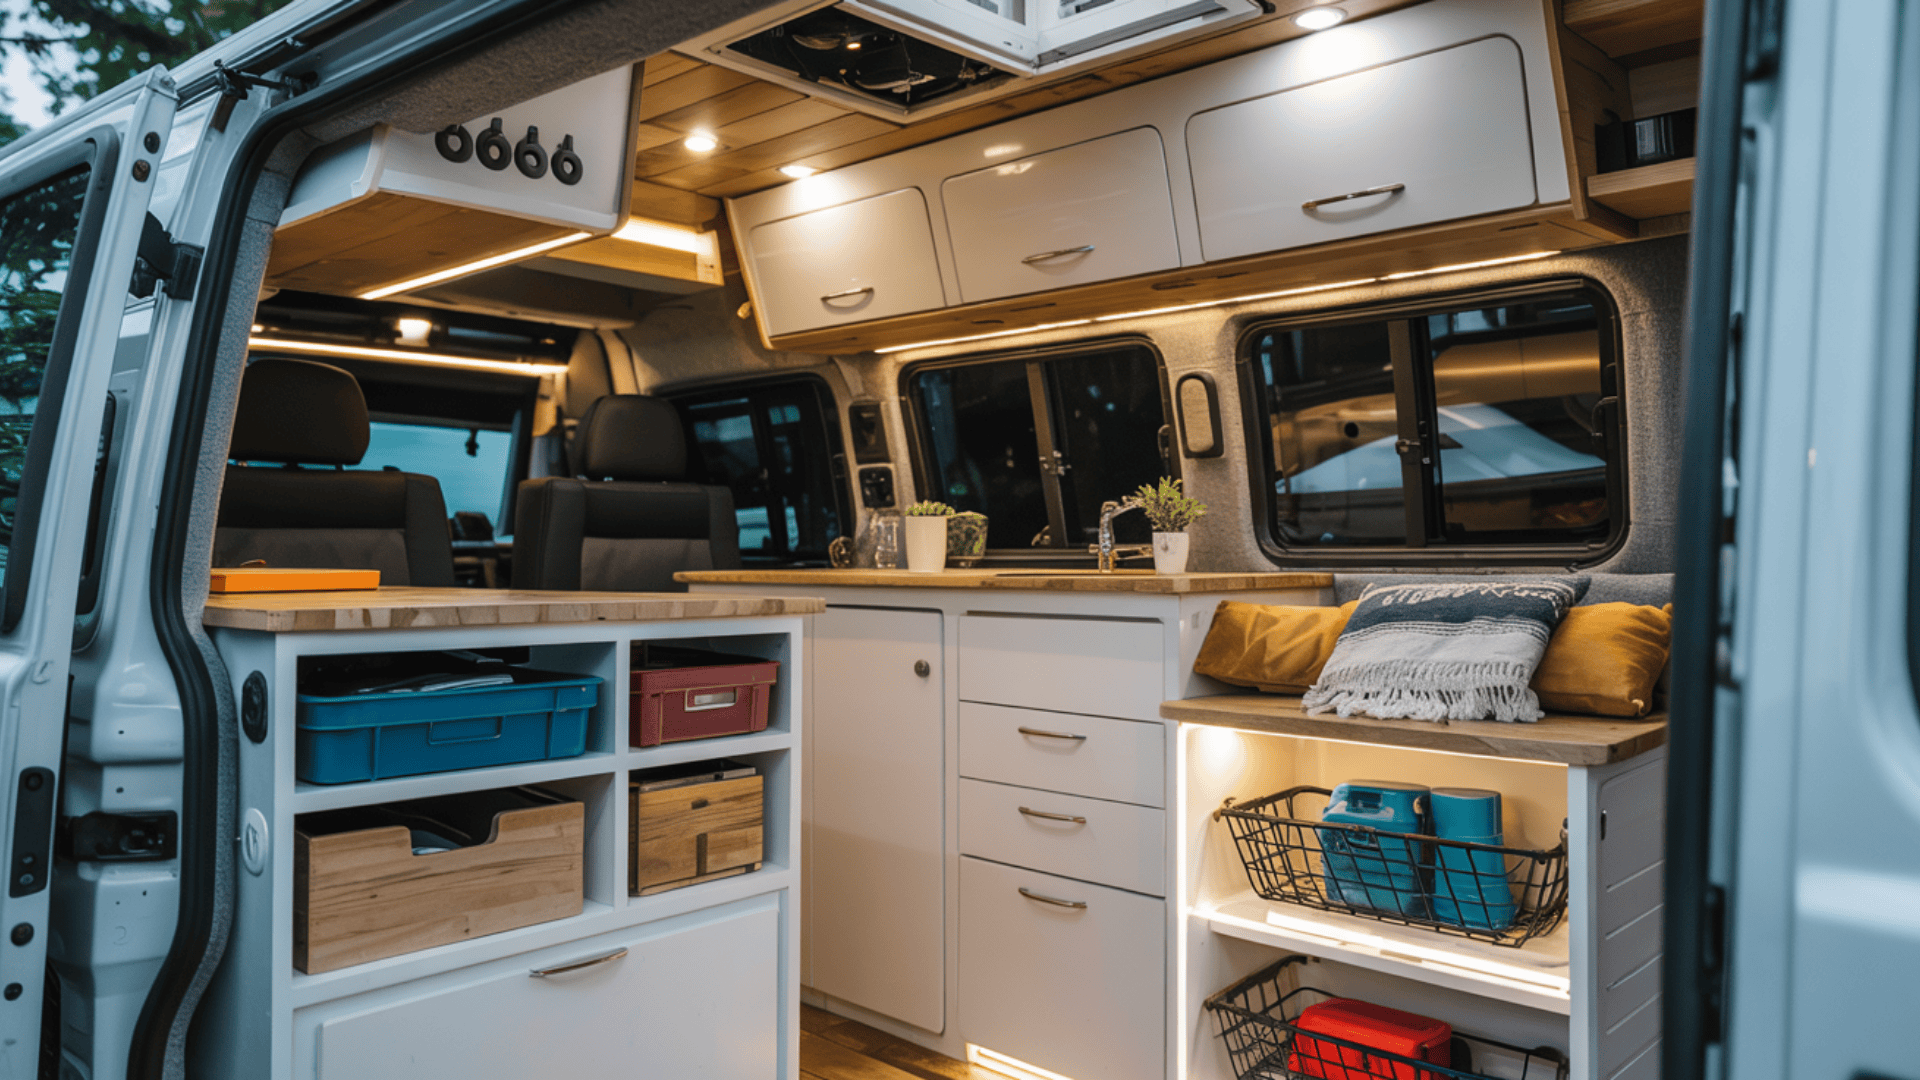
When you live in a van, every square inch counts. Smart storage solutions can make the difference between a cluttered mess and a tidy, functional home on wheels.
Materials & Tools
- Magnetic hooks
- Overhead cabinets
- Packing cubes
- Drawer slides
- Storage bins
- Roof racks
- Under-seat drawers
- Storage netting
Planning
- Thinking about your van in terms of zones helps maximize functionality. Clearly define your kitchen, bedroom, and garage areas based on how you’ll use the space daily. Most vanlifers find that dedicating space under fixed beds as a “garage” works well for storing bulky gear like camping equipment, sports gear, and tools.
- Consider your daily routines carefully. What do you need most often? Those items should be the most accessible. Seasonal gear can go in deeper storage areas that you don’t need to access regularly.
Construction
- Cabinet struts that hold doors open are worth their weight in gold—they prevent doors from slamming shut while driving and free up your hands when accessing storage. Soft-close handles reduce noise and prevent cabinets from flying open on bumpy roads.
- The Lagun table mount is popular because it allows you to adjust your table position and remove it completely when not needed. Swivel seats turn your driving cab into part of your living space when parked, essentially gaining you extra square footage without any construction.
Organization Touches
These little details make van living more pleasant. Suction cup organizers work well in shower areas. Bungee cords stretched across open shelves keep items from flying around while driving.
One cool hack: screw mason jar lids to the underside of cabinets, then twist the jars into place for hanging storage that doesn’t take up counter space.
Wall baskets mounted at eye level provide quick access to frequently used items. Velcro and magnetic strips let you create flexible storage solutions that can change as your needs evolve.
Step 5: Optimizing Lighting, Ventilation, and Decor
The right lighting and airflow can transform your van from a metal box into a cozy home. Plus, thoughtful decor adds personality without sacrificing functionality.
Materials & Tools
- Maxxair fans
- LED puck lights
- 12V reading lamps
- Light dimmers
- Skylights
- Under-cabinet LED strips
- Natural wood finishes
Planning
- Think of your lighting in three categories: task lighting for cooking and working, ambient lighting for general living, and night lighting for safe movement after dark. Each area of your van needs different lighting solutions, and having options creates versatility.
- Switch placement matters more than you might think. Make sure you can turn lights on when entering from outside but also control them from your bed. Some van lifers install switches near the bed, door, and kitchen area for maximum convenience.
Implementation
A roof-mounted fan like the Maxxair is essential for proper ventilation. It removes cooking odors, reduces condensation, and keeps the air fresh. Installing dimmable lights gives you control over brightness and helps save power when running on your battery.
Flexible lighting options add charm and functionality. Battery-powered twinkle lights create a cozy vibe without drawing much power, and wall sconces mounted on swivels let you direct light where you need it most.
Finishing Touches
The right decor choices make your van feel like home without adding clutter. White walls bounce light around, making the space feel larger. Curtains add privacy and help with temperature control. Even small plants bring life to your space (succulents work well for low-maintenance greenery).
For personality, consider a small mural on one wall, hanging lightweight art, or even a small section of chalkboard paint for notes and drawings. These touches transform a functional build into your personal space.
Cost and Timeline Considerations
| CATEGORY | COST ($) | TIME |
|---|---|---|
| Small Van | 5-10K | 1-2 months |
| Medium Van | 10-15K | 2-3 months |
| Large/Luxury | 15-25K+ | 3-4 months |
| Electrical | 1.5-5K | 1-2 weeks |
| Kitchen | 0.8-3K | 1-2 weeks |
| Bathroom | 0.5-2K | 3-5 days |
| Hidden Costs | 1.3-4.3K | Varies |
| Potential Savings | 30-70% | Adds complexity |
Pro Tip: Always add 20% to your budget for unexpected issues. Most van builders report spending more on plumbing, electrical systems, and insulation than initially planned. First-time builders typically underestimate both costs and time required by about 30%.
Wrapping It Up!
The most beautiful aspect of van renovation isn’t the finished product—it’s the evolution. Your first layout will change, your storage solutions will improve, and your systems will get more efficient with each trip.
Many van lifers report that their builds are never truly “done” but instead grow alongside their expedition.
Each modification represents a lesson learned on the road—the small space forces intentionality about possessions and priorities in ways that transform not just vans but lives.
As you pull away in your completed camper, remember that imperfection is part of the charm.
Crooked cabinet? Battle scar. Unconventional layout? Personality. Your van isn’t just transportation—it’s the physical manifestation of your desire for adventure. Now, make some memories in it.

